John Dough, that’s what we call our Sourdough Starter, was born a little over a month ago, and is a happy guy! We know that because He’s really Bubbly!
Building on His natural exuberance, and not wanting to waste anything We’ve come to discover that there is far more to Sourdough than Bread, and that daily Discards, that’s the half of the Sourdough Starter that has to be discarded, or otherwise used, on a daily basis, is really the more exciting part of working with Sourdough!
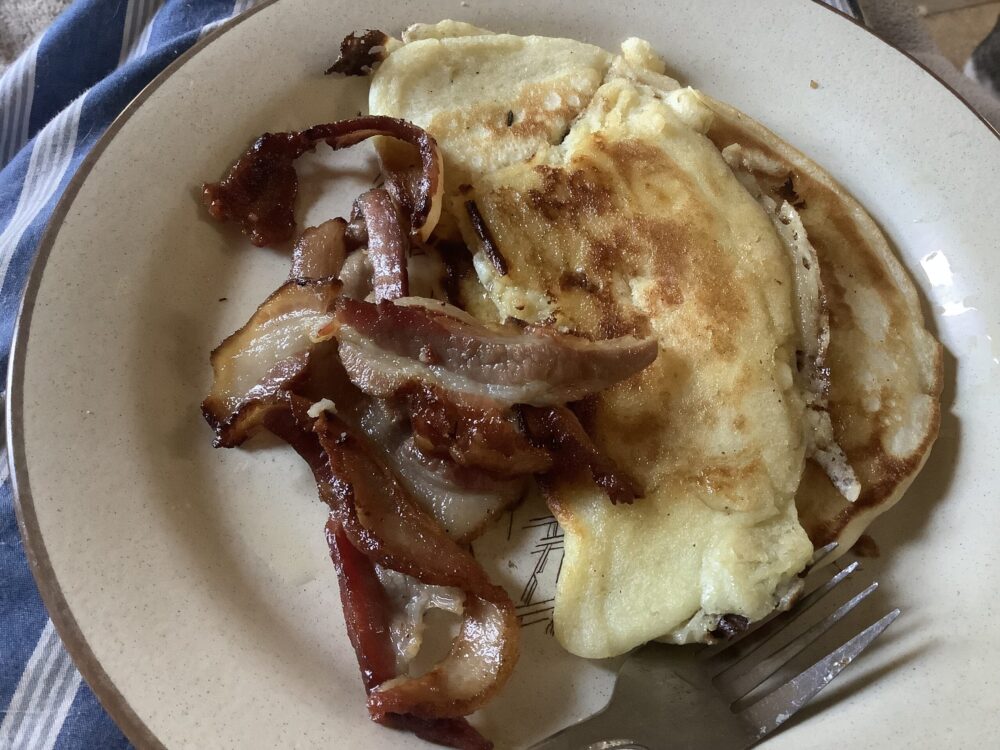
There are so many Recipes for Sourdough Discard that it opens a whole world of natural experiences, and these recipes are really on the Rise! Imagine having Tea and Crumpets! Yes!
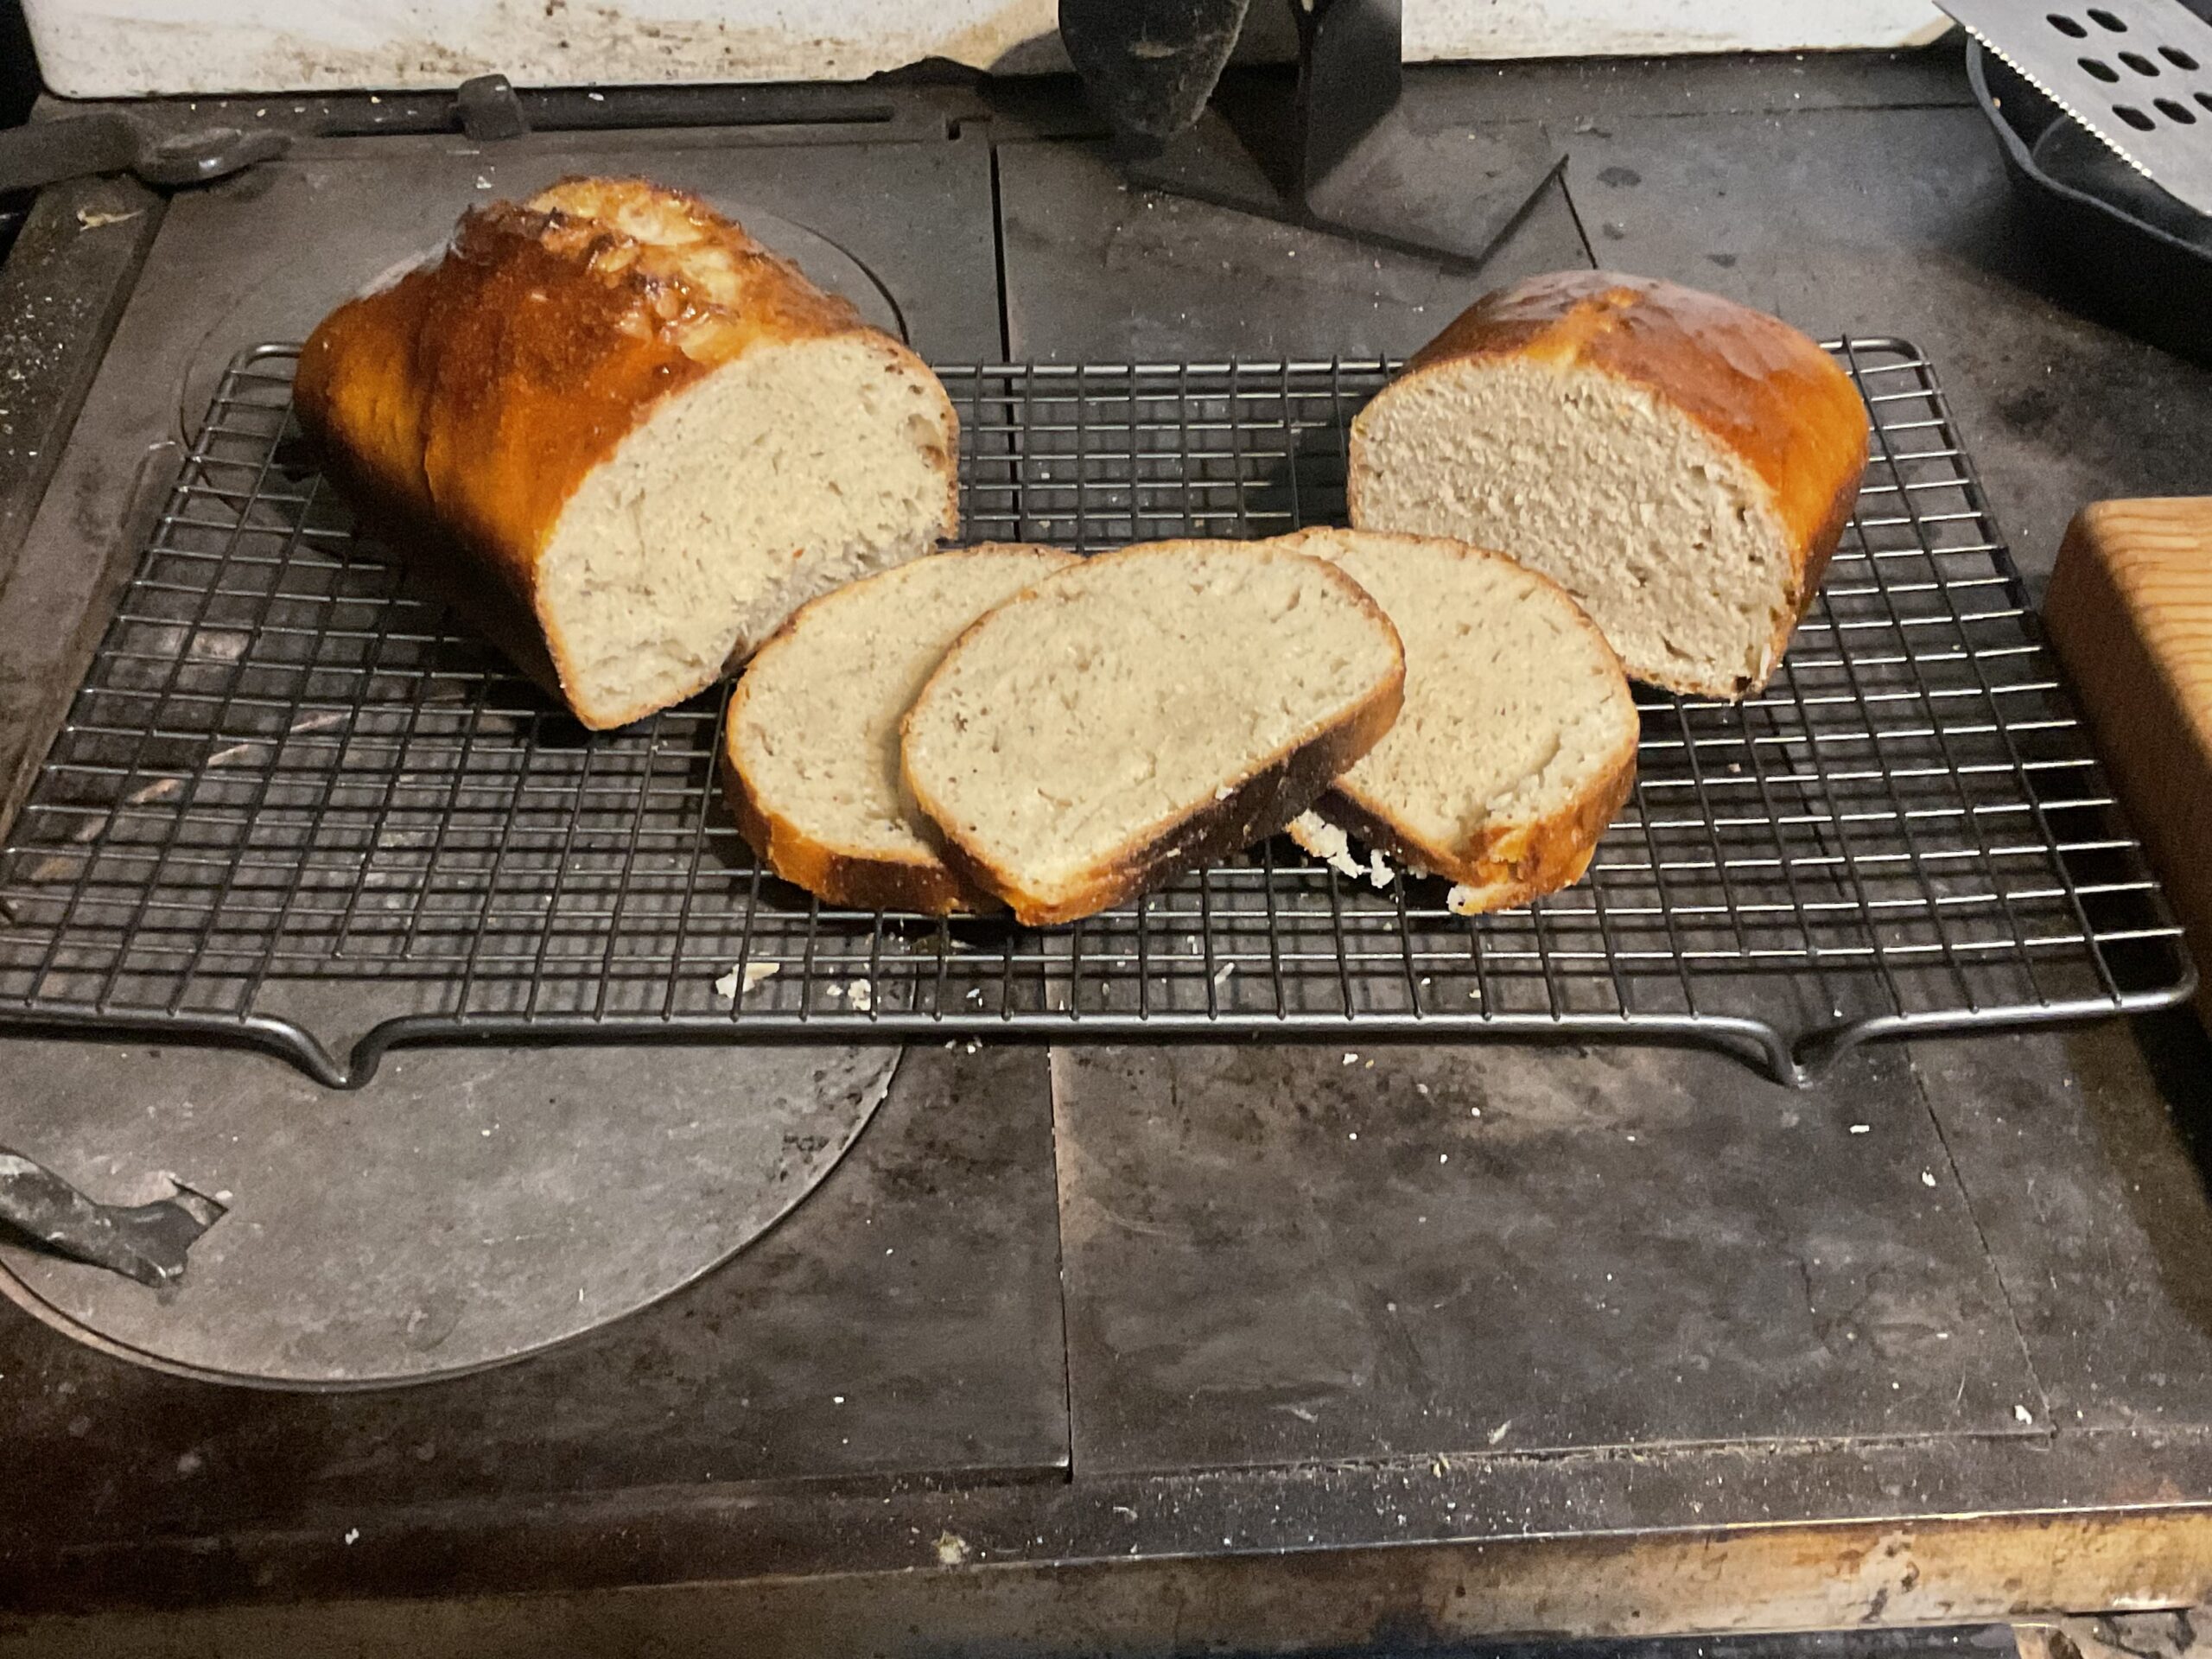
The other thing I love about working with Sourdough is learning to develop my own recipes! My first loaf was done using a simple recipe for Making Sourdough Bread Recipe and it went well, but not quite what I wanted. Or, perhaps, I just like to play with my food!
Either way, I love tweaking Recipes. The first recipe, probably more healthful, come from Cultures for Health, and calls for no sugar or soda, and little if any salt! It did taste good, but didn’t quite have the Rise I was looking for. Of course, part of that may have been because my Starter was relatively new. It takes at least a few weeks, to a few months, to develop a really great Sourdough Starter!
So, I began to experiment, sort of from instinct, and somewhat based on Sourdough Pancake and Sourdough Crumpet Recipes, and I added in some sugar, soda, and salt. It worked, my Sourdough Bread rose far better. However, the .crust was still much harder than I wanted it.
Then, I thought about it, and decided to add some Apple Cider Vinegar to the recipe. I happen to love cooking with Apple Cider Vinegar. By the way, do You happen to recall the TV Show, The Urban Peasant? James Barber, on one episode, picked up a measuring cup of flour, or sugar, or something, and poured a bit in his palm and said, “That’s a teaspoon”, and continuing to pour, “That’s a Tablespoon” and pouring stilll more, “That’s too much!” That’s sort of the way I like to cook, and bake!
Some people will tell You Sourdough Baking is like Science, and some aspects definitely are, but I can’t help think that some of the ole Camp Cooks, in the Klondike and Lumber Camps, probably didn’t pay that close of attention to the grams of flour or sugar or other ingredients on a digital scale! So, I say, somewhat joking, “If Sourdough is a living Culture, which it is, then let it guide me!”. Then go somewhat by gut and instinct! Bear in mind if you do this You may well waste a batch! OrTwo! I’ve been lucky, and haven’t yet, and we’d probably still find a way to use it!
Anyway, since I’ve had a friend, Lisa, ask for my Recipe, which I’m still developing, I decided that I’d try to put it into exact measurements. Honestly, trust your gut, and if it’s a little dry add some liquid and if it’s a little to liquid, add some flour! Taking that into consideration, and using l disclaimers, here’s my recipe….
I take 2-1/3 Cups of active Sourdough Starter and add 3 Tablespoons of Sugar, a bit of Salt, maybe a half to one teaspoon of Salt (depending on your personal preference and dietary restrictions) and a half Tablespoon of each Baking Soda and Apple Cider Vinegar. Mixing that together with a spatula and a fork, one also helps clean the other, and watching the Bubbles. The Starter mixture should be bubbly.
Once you have that working, add in 3 Cups of Flour. Mix it all together, but don’t over mix. It should be bread dough consistency. Or, well, almost!
You’ll also have to mix in some water. Some Luke Warm Water. Approximately a Half to One Cup. Just add it slowly till all the flour is part of the dough. Again, don’t over mix.
Then, place a warm, damp, dish towel over the bowl and place the bowl in the oven with a low heat of about 100 F. Watch it, check it at about five to ten minutes to see it’s not to hot. You’re not wanting to bake it yet, the low temperature oven and wet cloth help make your oven a Bread Poofer.
I leave it in the oven, at the low temperature, for about 30 minutes. Then remove, uncover, and dust it with flour. When you first remove it from the over the dough will be sticky, just dust it with enough flour to make it easier to handle.
Pull it, stretch it a bit, and reform it in to a ball.
Place it back in the oven at the same low temperature for another 30 minutes. Repeat this process till you’ve removed it from the oven for the fourth time. The fourth time, do the same, but put it I a greased and floured bread pan before returning to the Oven at the same low temperature. Watch it closely again.
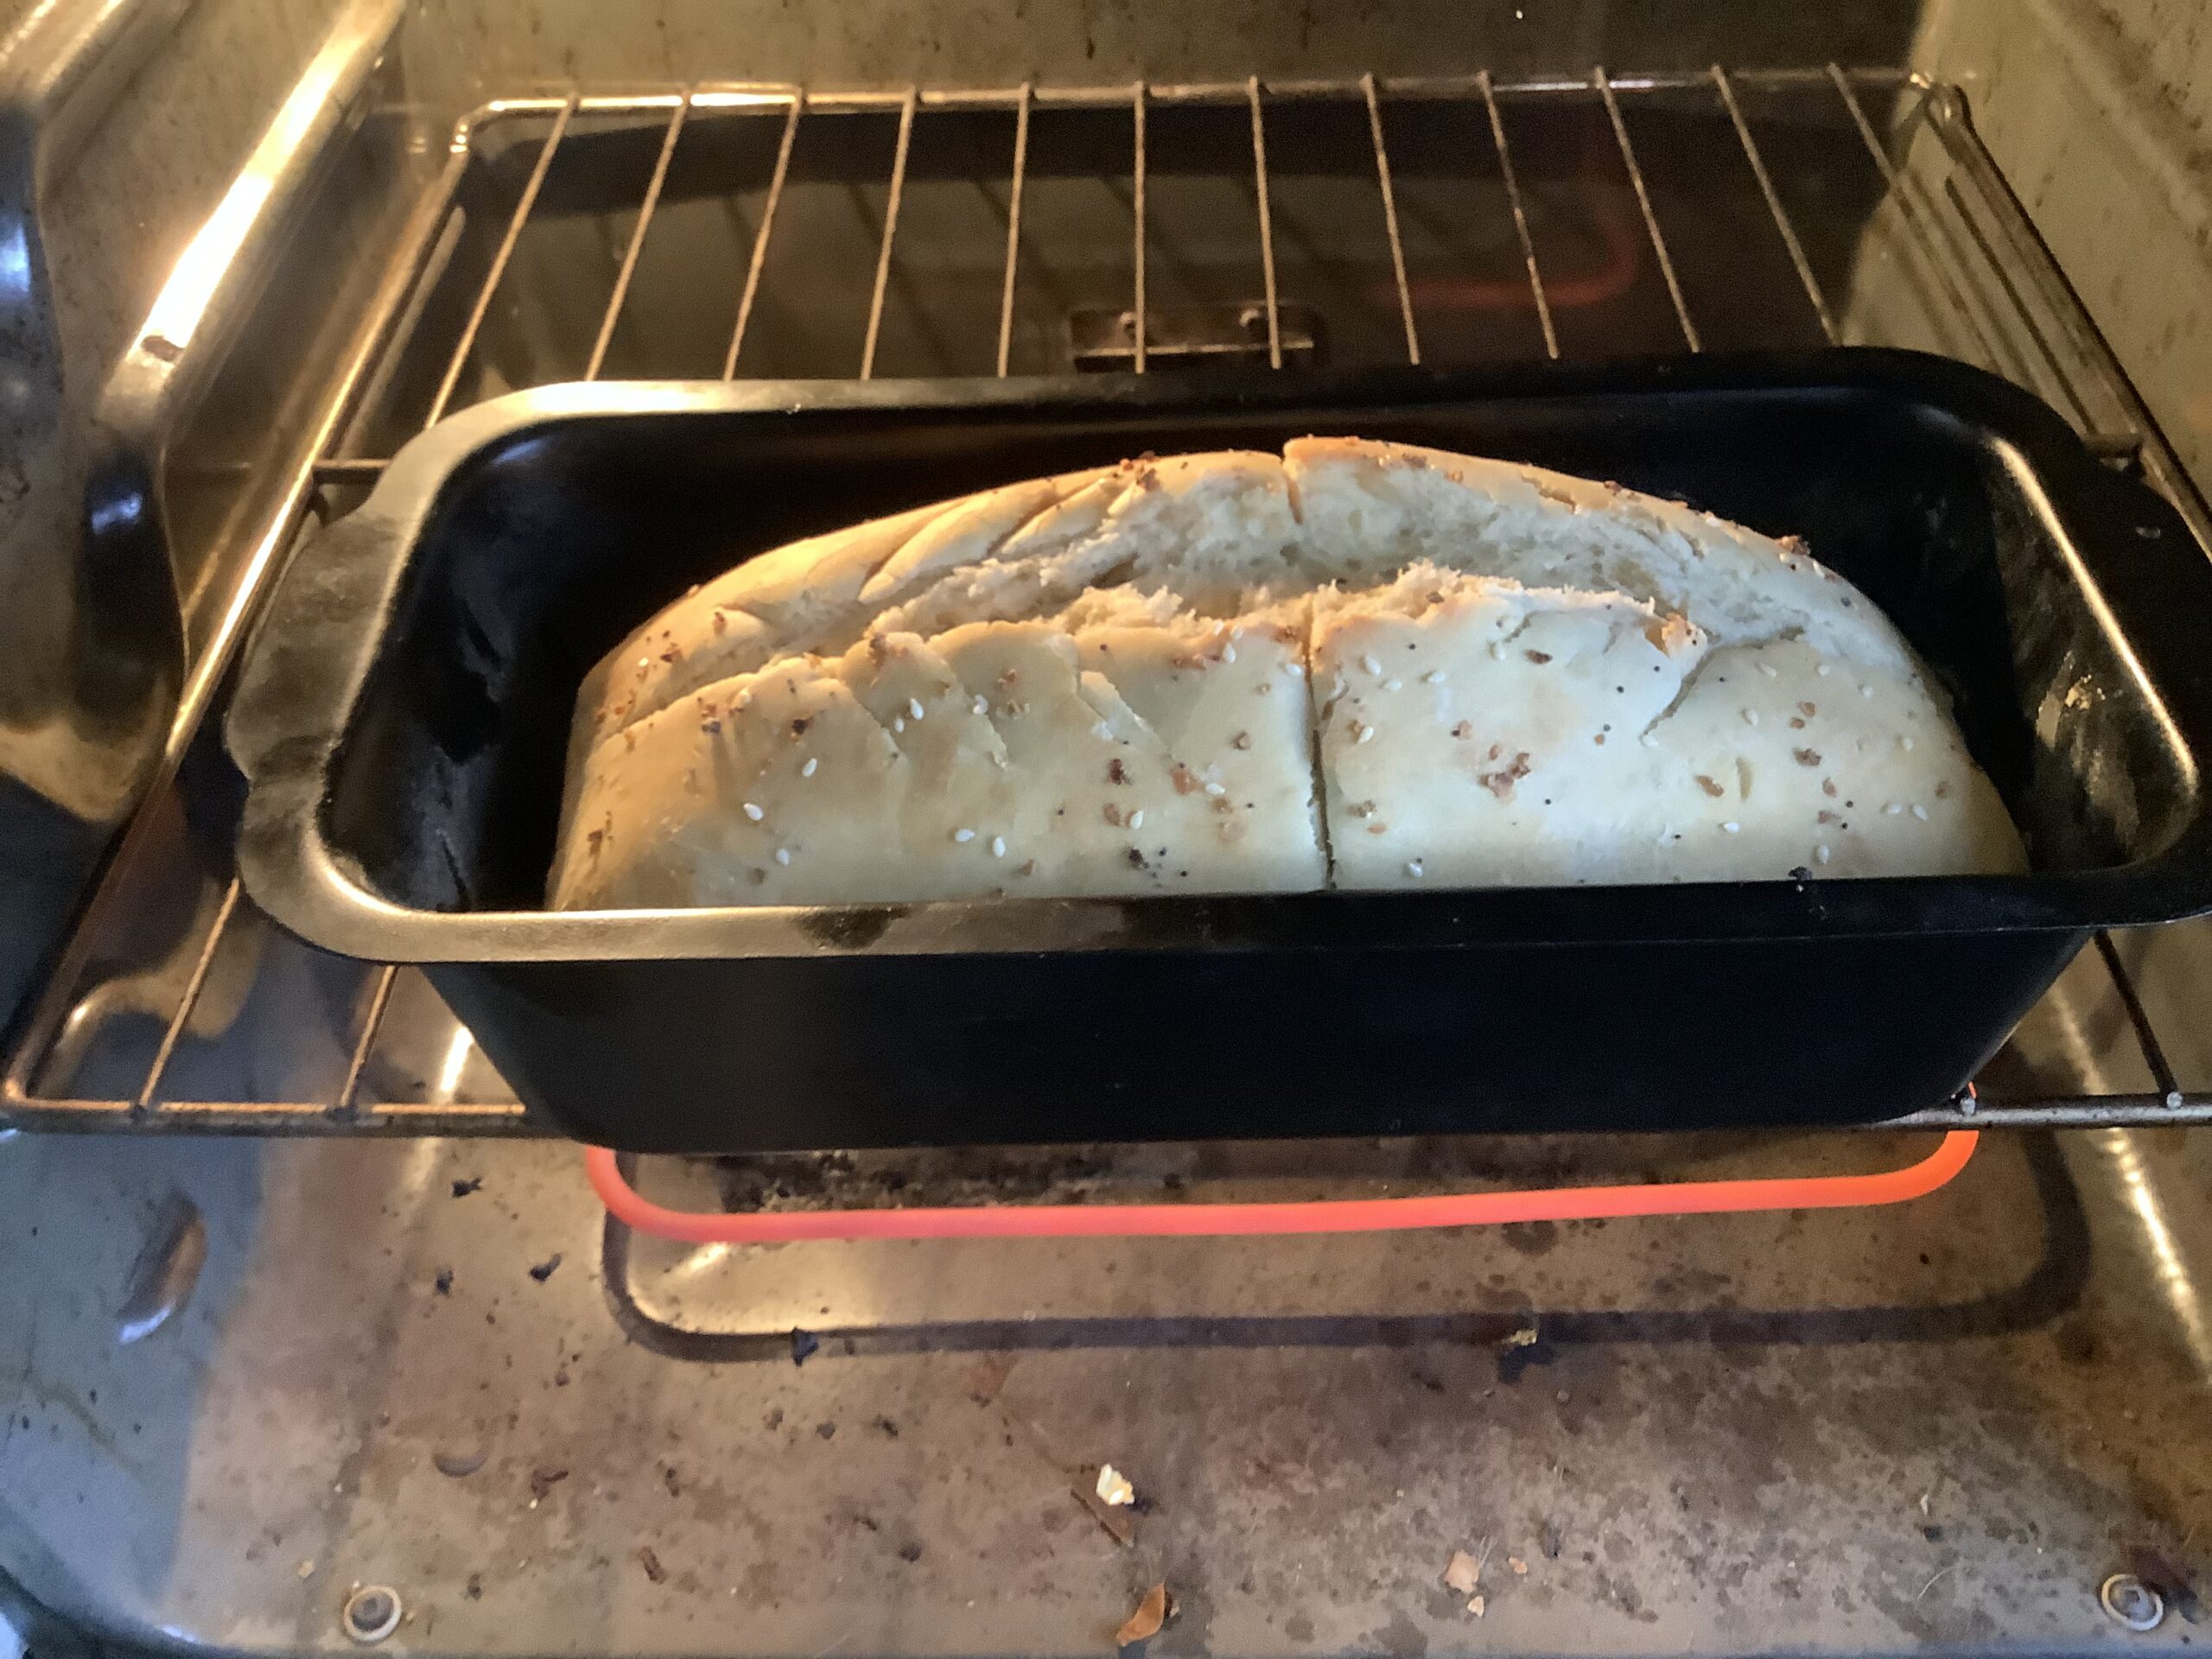
After the dough has risen another 30 minutes, this time in the pan, in the low temp oven, turn the over up to 400 F.
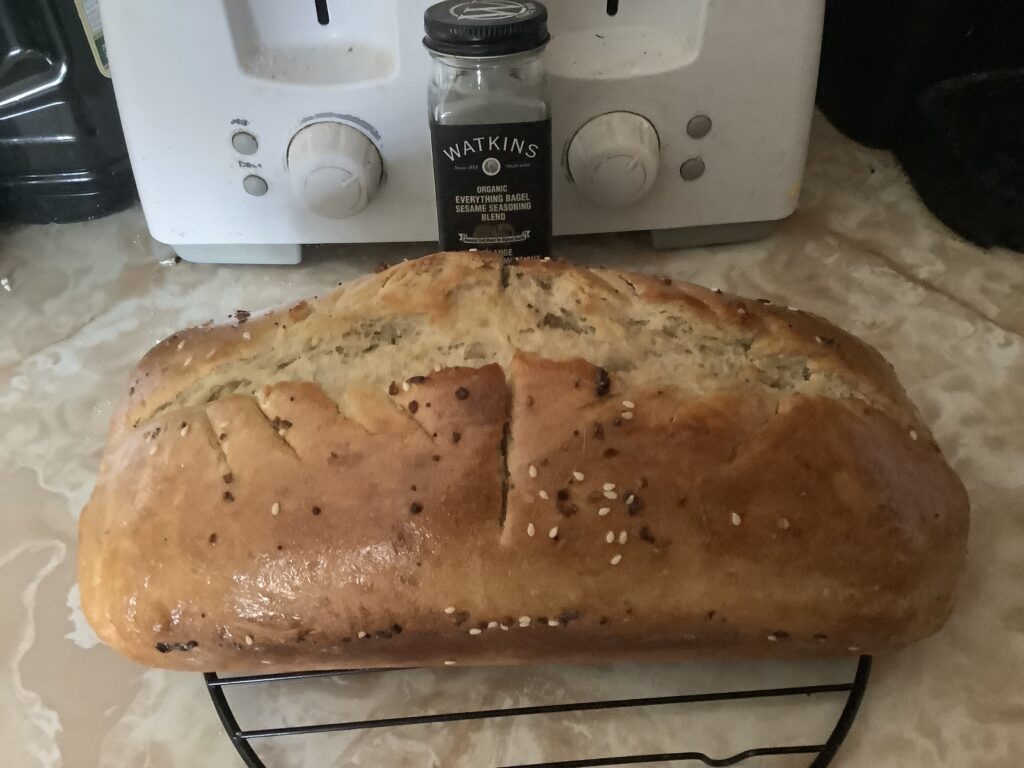
Remove it after the first 5 minutes at 400 F, when the top has just started to brown. Use a sharp knife and cut a small slit down the middle of the top. That allows the gases to escape. Otherwise it’ll blow the sides out. It may anyway! If so it’s not a big deal.
Return it to the oven, at 400 F. Check it again in 10 minutes, and again in after another 15 minutes at 400 F. Total time in the oven at 400 F should be about 30 minutes. Actually, you need to watch it, and maybe turn it around about half way. Some ovens have uneven heat and that can also cause the sides to blow out of the bread! Honestly, it’s not that bad!
It’s easier than it sounds and you’ll soon get used to it.
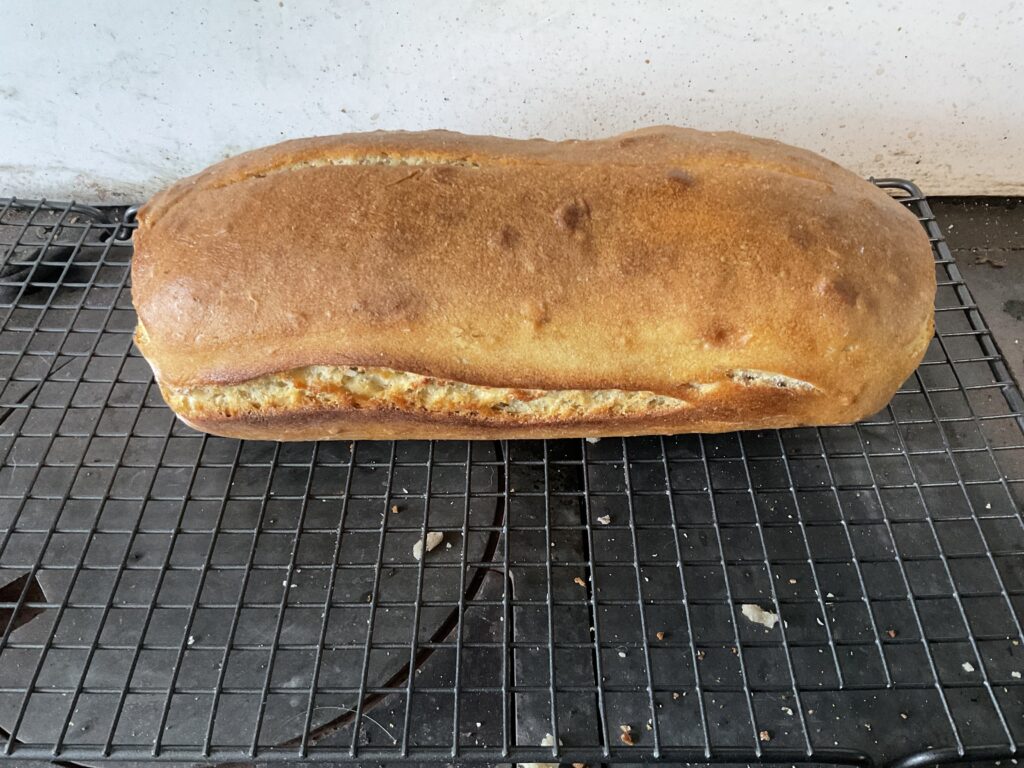
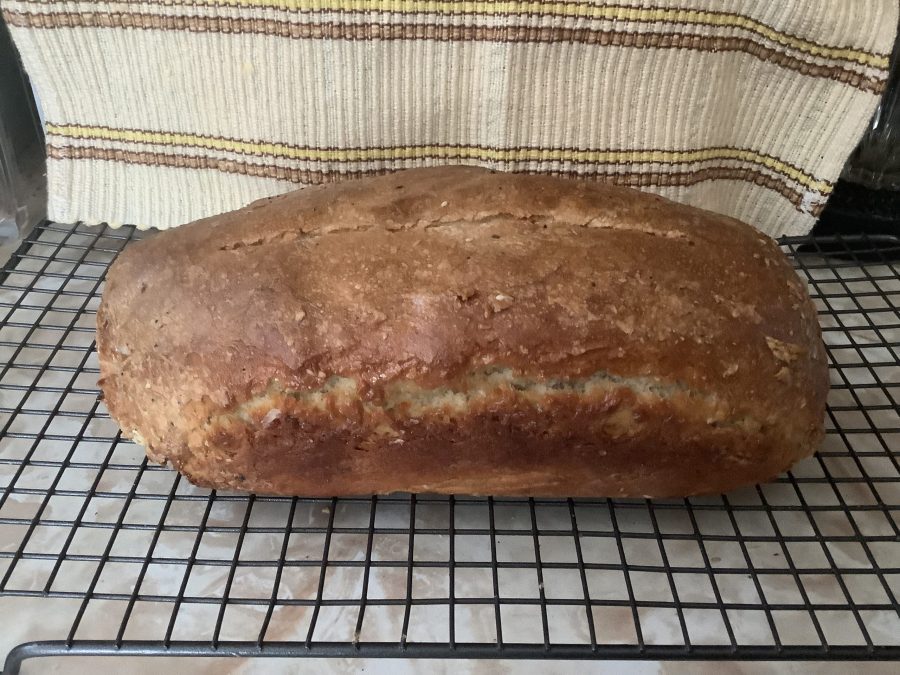
When You remove the Bread from the Oven after it’s been in there for about 30 minutes at 400 F it shou,d be done. You’ll get to know it’s done mess by instinct, but it should have a somewhat hollow sound when you tap the bottom. Another thing to watch is that your over doesn’t burn the bottom. If your over heats quicker on the bottom, and it may take you a couple goes to know it’s actually doing so, you can take your bread when nearly done, say at the 20-25 minute mark, and turn it over in the Bread Pan. Thus preventing it from over cooking the bottom and allowing the top, now the downward side, to finish better. Perhaps quicker too!
Don’t be discouraged, You’ll catch on quickly enough. With every loaf getting better and better!
So, to recap I use
2-1/3 Cups Starter
3 TSpn Sugar
1/2 TSpn Soda
1/2 TSpn Apple Cider Vinegar
and about 0.5-1 Teaspoon of Salt
And 3 Cups Flour
I’d love to hear About Your experiences with your Sourdough Starter, Discard and Breads. What else have You made? Tell us about it in the Comments below…