Category: Uncategorized

Turning Old Burnt Out Hay Fields to Grazing Pastures and Gardens

No Comments

It’s been just a couple weeks short of two years since we moved our animals on to this property. 

The Barn Property Sept 2022

When we were asked to come there and use the land and barn, the fields were mostly old and burnt out, full of invasive and toxic weeds. Two years later through the use of rotational pasturing, and regenerative farming techniques these are those fields today… 

While the original goals of the Property Owners, of “Just keep the trees from growing in, and the fields from getting over taken” with hopes of getting rid of the toxic and invasive plants. Although we wanted to help showcase the work, and help make this place even more beautiful. We’ve used Goats, Pigs, Chickens, Rabbits, and now Sheep to help improve this wonderful old property. Just look at those hay fields now! A true testament to the capabilities of these wonderful birds and animals! 

Not only have we helped keep the fields from growing in, we’ve helped to eliminate many of the weeds, both toxic and invasive. Although it’s still a work in progress! Sheep need adequate pasture grasses and forage to thrive and our shearer and others, and even the wool quality of the sheep have all testified to this being the case! It’s incredible to see the transformation that’s taken place! 

We’ve even managed to turn some of this ground into gardens!

2024 Garden at The Barn Property

Using deep bedding for our animals through the winter helps provide well composted hay and manure to help naturally grow the gardens. The whole thing is laborious and yet rewarding. We work mostly by hand, employing time honoured methods and let our animals do most of the heavy lifting! It’s a labour of love, one where we always strive to be good Stewards.

Sourdough Molasses Brown Bread

No Comments
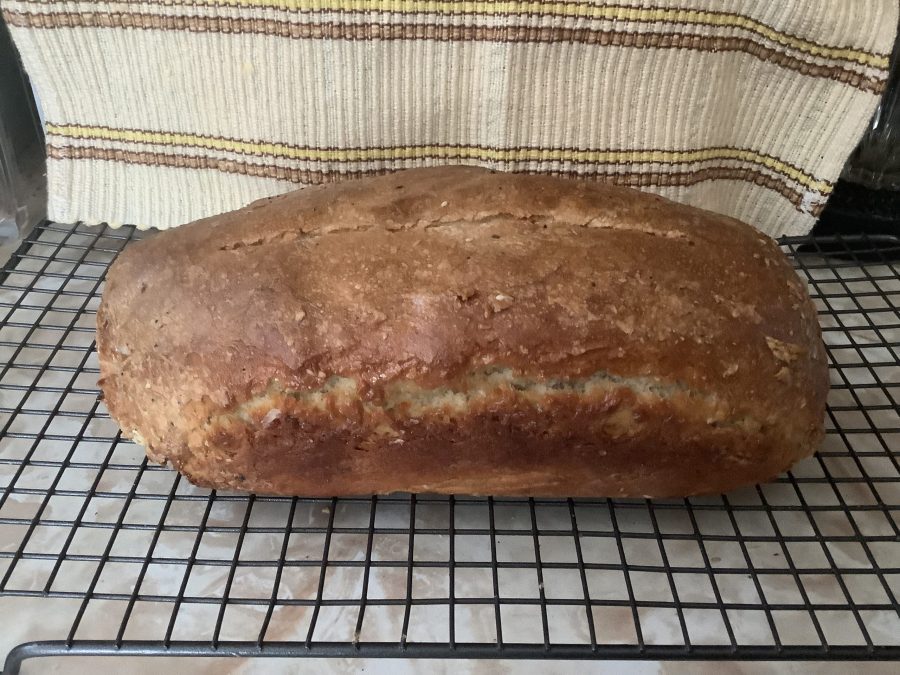
Sourdough Molasses Brown Bread

I love Sourdough, always have, and I’ve also loved Molasses for as long as I can remember. So, it make’s perfect sense to me that the two should go hand in hand! Right!? 

However, I also tend to be a rather impatient, and waiting for bread to rise for 6-8 hours or longer. I’ve done it, but not so much! I’d rather find ways to speed things up. So, I make my own recipes! 

I start with the Sourdough Starter we made from just water and flour. Started the Starter about 6 months ago, and call Him, John Dough! 

I put 4 Cups of all purpose flour I a large bowl. I put about two cups of Starter in a four cup measuring cup. To the starter I added, (I really don’t measure, I just guesstimate the amount in my hand) about 1 teaspoon each of sugar, baking soda, and salt. Plus about a tablespoon of Apple Cider Vinegar. When I stir that up with a fork, it rises to nearly fill the measuring cup. In another measuring cup I put about a half cup of molasses. Then I mix about a third of the Starter Mixture into the flour. Then I mixed about half the molasses into the flour mixture. Finally I added the remaining molasses into the remaining starter mixture and once mixed I added it into the flour mixture. Honestly at this point it was more like cookie dough. (Might try that next). So, I added in more flour, about a quarter to a half cup, mixing in until the dough was the right texture for bread dough. 

Then I put a little olive oil in a bread pan and used a paper towel to spread it on the bottom and side of the pan. Then dusted the pan with Watkins Cinnamon. Then placed the dough into the pan. 

I turned the oven on to about 150 F to warm up, and placed the loaf pan in the oven, covered with a warm, wet, dish towel. After about 5 minutes I turn the oven temperature down to just under 100 F. Then let the dough double in size. Sometimes I remove the dish towel and wet it again with warm water. And keep it over the top of the rising loaf. Once the loaf rises to desired level it’s time for the bake. 

I turn the temp up to 400 F. and place the Loaf in the oven uncovered. Dish towel now removed. After about 5 minutes I cut a slit in the top of the loaf to let the excess steam escape. Otherwise the sides of your loaf will blow out! Sometimes they do a bit anyway! It’s ok! 

I check the loaf after 20 minutes and then about every 5-10 minutes till done. There are a few ways to know when it’s done. Tap it and it should sound hollow. I let it bake till the outside looks done, sometimes a tad over done. The smell is a big indicator, and an old trick is to stick a knife in it and pull it out. If the knife comes out clean it’s done! Really, it’s kind of trial and error! After a few loaves you’ll get to know. I still worry about it every time! 

When done, let it cool on a wire rack. I often let it cool off in the pan to finish baking! Then, once it’s cooled off, somewhat, I put it on the rack. 

This particular loaf has Rolled Oats sprinkled on it and baked on top. If not I’d use a paper towel to smear butter on the top; and all over really! 

If You dare to compare, or try my recipe, please let me know in the comments below. If you’re local and need some Starter, let me know! 

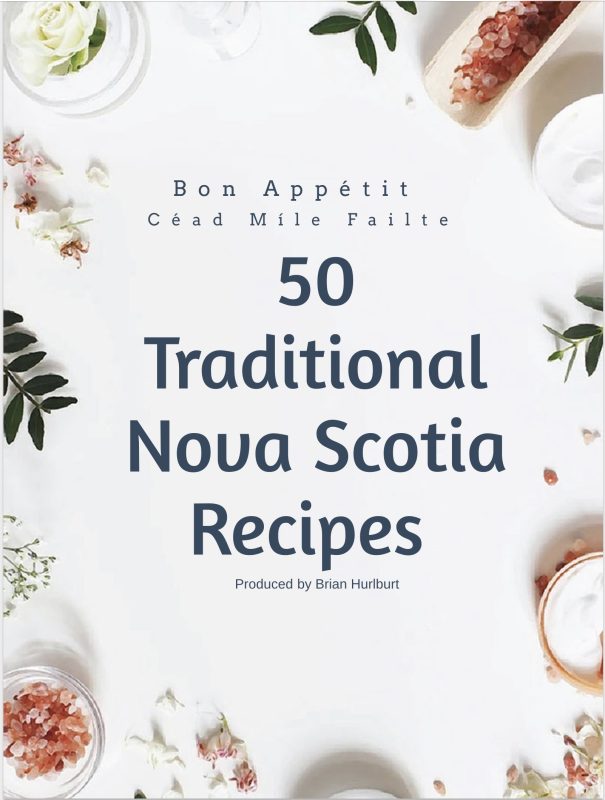
50 Traditional Nova Scotia Recipes

50 Traditional Nova Scotia Recipes Book Cover

Here’s a sneak peek at my new Cookbook, 50 Traditional Nova Scotia Recipes. It hasn’t been released yet! In fact, I’m still working on it! 

The current Title says, 50, but I actually have over 100 Recipes! I’m also not totally set on the Cover Design which may change to reflect a more Nova Scotian look and feel. 

Reserve Your Copy Now, for Free, and we’ll keep You updated about the Book … 

Click Here to Reserve Your Copy

I thought perhaps, with Summer coming soon, You might like to see one of the Recipes! Hodge Podge, if You’re from Nova Scotia you’ll know, and probably have your own way of making it! However, for those who have yet to discover it…

Here’s a traditional Hodge Podge recipe:

Ingredients:

4 cups chicken or vegetable broth

2 cups diced potatoes

1 cup diced carrots

1 cup diced turnips

1 cup diced green beans

1 cup fresh or frozen peas

1 cup fresh or frozen corn kernels

1 cup diced onions

1 cup diced celery

1/2 cup heavy cream or evaporated milk

Salt and pepper to taste

Chopped fresh parsley for garnish (optional)

Instructions:

In a large pot, bring the chicken or vegetable broth to a simmer over medium heat.

Add the diced potatoes, carrots, turnips, onions, and celery to the pot. Simmer for about 10 minutes or until the vegetables are partially cooked.

Add the diced green beans, peas, and corn to the pot. Continue to simmer for another 10-15 minutes or until all the vegetables are tender.

Stir in the heavy cream or evaporated milk and season with salt and pepper to taste. Adjust the seasoning according to your preference.

Remove the pot from the heat and ladle the Hodge Podge into bowls. Garnish with chopped fresh parsley if desired.

Serve hot and enjoy this comforting and hearty Nova Scotian dish!

Feel free to customize the recipe by adding other seasonal vegetables or herbs according to your taste preferences. Hodge Podge is versatile and adaptable, making it a perfect dish to showcase the bounty of Nova Scotia’s gardens.


Please Remember to Vote For Me


FavChef2024 4th PlaceSimply Click on the Photo to Vote

Categories: Uncategorized